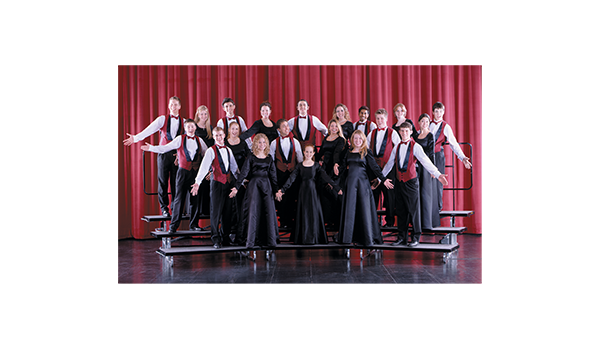
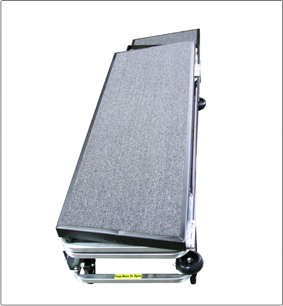
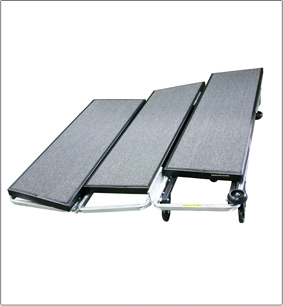
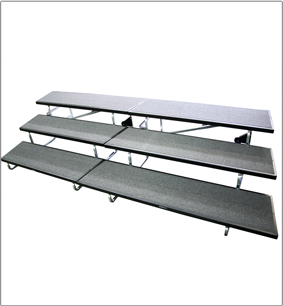
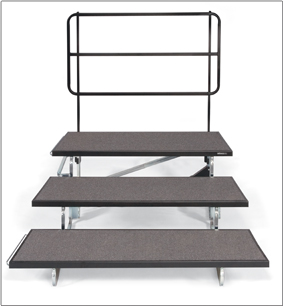
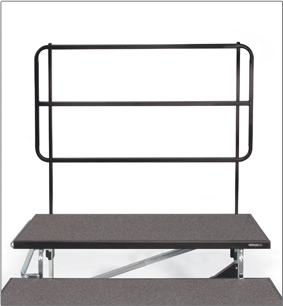
TFR SERIES TRANSFOLD MODULAR CHORAL RISERS-QUICK SETUP MULTI LEVEL FOLDING RISER
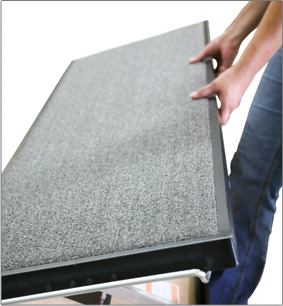
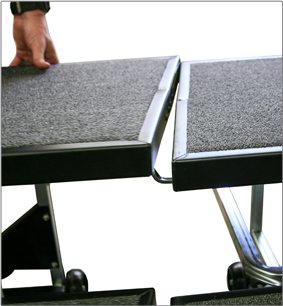
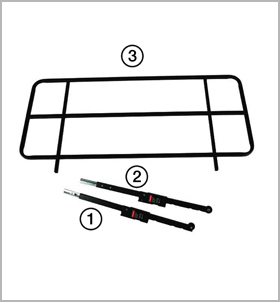
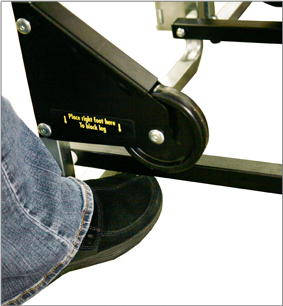
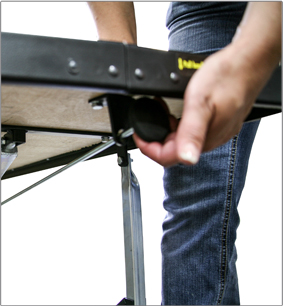
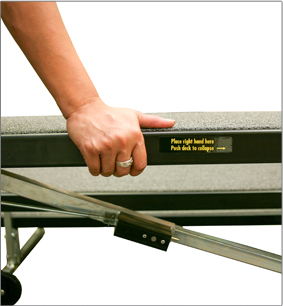
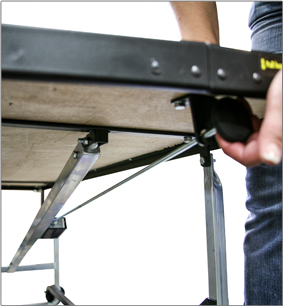
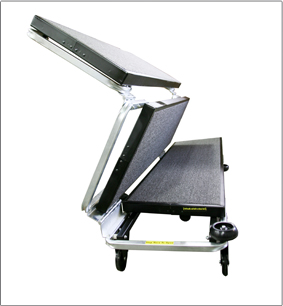
The TransFold standing choral riser is ready to go wherever your choir performs. Built-in wheels make it easy to roll the TransFold unit from the classroom to the auditorium or up stairways and on to a bus or van. Upon arrival at the performance venue, your TransFold risers set up in seconds, so that they will be ready when you are. Midwest's exclusive, gas-spring assisted design allows the unit to open with moderate foot pressure, taking the strain out of set up. This also ensures a safe, controlled motion when folding the unit for transportation and storage.

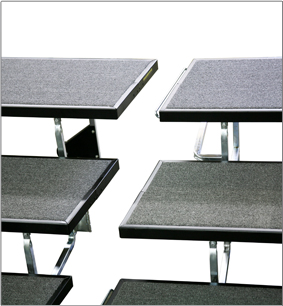
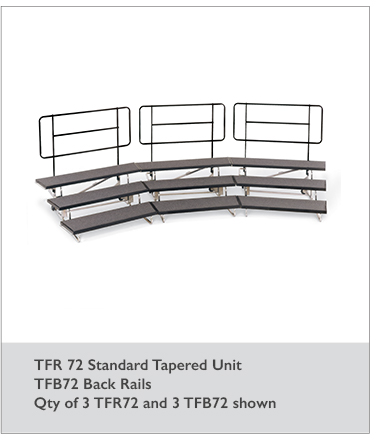
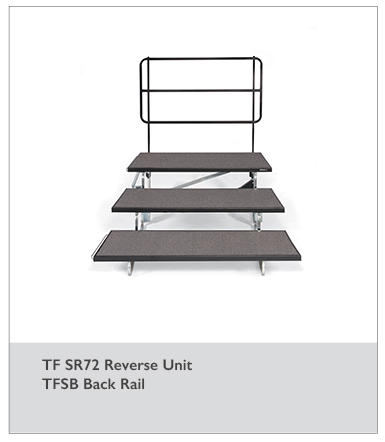
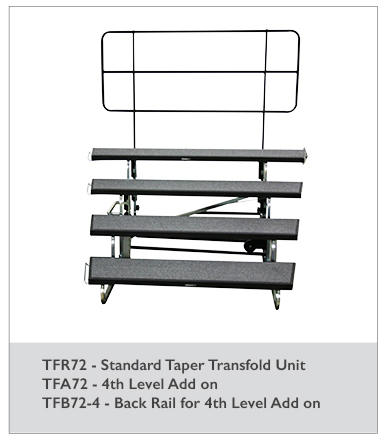
Midwest Folding's 3 tier riser modules can easily be arranged in sets to create your own custom riser configuration. 3 tiers not enough? Add on an optional 4th level for additional capacity!


  • Leg Brace
  • Leg Brace
  • Leg Brace
Leg Brace Leg Brace Leg Brace
/div>
GET A QUOTE
Select Finish options
Select Finish Options
Carpet Colors

Charcoal Grey

Ebony Black

Pewter Grey
Skirting Styles
No Skirting

Box Pleat

Shirred
Black Metal

- Black
 
Quickship Quote 
All quickship products ship within 5 business days. This option is only available on select products and for quantities less than 10. For a full list of available quickship products click here.
Select Finish Options
Carpet Colors

Charcoal Grey
Black Metal

- Black
 
Added to Quote Cart
 
Features
  • Built-in wheels
  • Gas-spring assisted opens with moderate foot pressure
  • Easily transported and stored
  • To fold the unit for transportation and storage, activate the upright lock release and gently push the unit horizontally. The gas spring cylinder assures a safe controlled motion.
  • Drop-in couplings securely connect all units to prevent accidental movement during the performance.
  • 10-Year Warranty
Specifications
Available Styles
72" TransFold Unit
72" Reverse Taper
48" TransFold Unit
Deck Styles
Carpet
QuickShip Eligible
Some models/styles are available for QuickShip (ships within 5 days for quantities of 10 or less). Look for the QuickShip tag when requesting a quote.
Note(s):
SAFETY NOTICE: Guard rails should be used on sides and rear.
Finishes
Carpet Color Options

Charcoal Grey

Ebony Black

Pewter Grey
Skirting Styles

Box Pleat

Shirred
Skirting Colors

Black

Burgundy

Jade

Navy
Metal

Black
 
 
Instructions
Setup
Step 1: Roll Unit
Roll unit to an area with a hard, flat floor. (Warning: Should only be set up and used on a hard flat surface.)
Step 2: Grasp and Lift
Grasp the edge of the top deck with both hands and lift up while pulling towards you. This will unfold the unit. (Caution: Do not place hands along hinged areas.)
Step 3: Position Unit
Lay the unit flat on the floor with all three decks roughly parallel to one another. The carpeted side should be up.
Step 4: Rise Unit
Locate the wheeled end of the rise and its leg assembly. Apply foot pressure to the leg assembly unit until it begins to rise on its own. The unit should continue to rise until it is fully upright and locked. (Important: Make sure that you hear an audible "click," indicating that the automatic lock has engaged.)
Coupling with Additional Units
Step 1: Position
Set up the units involved and position them roughly in the desired arrangement.
Step 2: Lift and Place
Life one riser and place it over the coupling bracket of the adjacent unit.
Step 3: Secure
Make sure the first and third levels are resting secure on the coupling brackets of the adjacent unit.
Installing Back Rail
Step 1: Locking Bracket
Install each post by hooking the locking bracket around a riser leg then swinging the clamp down. Wheels should face inward
Step 2: Back Rails
Install back rails by inserting the posts into the back rail assembly until the automatic snap-lock engages.
Folding for Transport
Step 1: Back Rails
Remove the installed back rails. Separate the riser unit from adjacent units.
Step 2: Secure Sliding
Place right foot under the wheel bracket to prevent the unit from sliding.
Step 3: Grasp Frame
Grasp the lock release, located under the left end of the top deck (3rd level), with the fingers of your left hand.
Step 4: Grasp Frame
Place right hand on the frame. Labels on the riser unit show recommended placement.
Step 5: Release Lock
While pulling out on the lock release, push the deck toward the right with your right hand until the unit folds to the floor
Step 6: Fold Together
Move to the front of the unit and grasp the front edge of the lower deck with both hands. Lift the edge and allow the decks to fold together.
1500 Taylor Avenue, Springfield, IL 62703
312.666.3366 or 800.621.4716
info@midwestfolding.com